最近将原本的 Iterm2 + Oh My Zsh 更换为 Ghostty + zinit 配置终端,在使用的过程中优化了一下体验,给大家分享出来作为参考:
- 终端配置:
Ghostty的配置是以文件形式存储在$HOME/Library/Application Support/com.mitchellh.ghostty/文件下的,修改或者更新配置通过快捷键 cmd + ,使用默认程序打开配置文件,全部的配置选项在: https://ghostty.org/docs/config/reference 可以查看
贴出我的配置:
1
2
3
4
5
6
7
8
9
10
11
12
13
14
15
16
17
18
19
20
21
22
23
24
25
26
27
28
29
30
31
32
33
34
35
36
37
38
39
40
41
42
43
44
45
46
47
48
49
50
51
52
53
# --- Typography ---
font-family = "Maple Mono NF CN"
font-size = 18
adjust-cell-height = 2

# --- Theme and Colors ---
theme = Catppuccin Mocha

# --- Window and Appearance ---
background-opacity = 0.95
background-blur-radius = 30
macos-titlebar-style = transparent
window-padding-x = 10
window-padding-y = 8
window-save-state = always
window-theme = auto

# --- Cursor ---
cursor-style = bar
cursor-style-blink = true
cursor-opacity = 0.8

# --- Mouse ---
mouse-hide-while-typing = true
copy-on-select = clipboard

# --- Quick Terminal ---
keybind = global:ctrl+grave_accent=toggle_quick_terminal
quick-terminal-position = center
quick-terminal-screen = mouse
quick-terminal-autohide = true
quick-terminal-animation-duration = 0.15

# --- Security ---
clipboard-paste-protection = true
clipboard-paste-bracketed-safe = true

# --- Shell Integration ---
shell-integration = zsh

# --- Claude 专属优化 ---
# initial-command = /opt/homebrew/bin/claude
initial-window = true
quit-after-last-window-closed = true
notify-on-command-finish = always

# --- Performance ---
scrollback-limit = 25000000

# --- 基础分屏(左右添加屏幕)---
keybind = cmd+d=new_split:right
keybind = cmd+shift+enter=toggle_split_zoom
keybind = cmd+shift+f=toggle_split_zoom- zinit
zinit是一个zsh的插件管理器,可以使用 bash -c "$(curl --fail --show-error --silent --location https://raw.githubusercontent.com/zdharma-continuum/zinit/HEAD/scripts/install.sh)" 一键安装。
在这里贴出我常用的插件:
语法高亮: zinit light zdharma-continuum/fast-syntax-highlighting
自动建议: zinit light zsh-users/zsh-autosuggestions
补全: zinit light zsh-users/zsh-completions
3.优化 —— Claude自定义函数
为了避免所有内容全都堆在 .zshrc 中,我把自定义逻辑单独放在一个目录里:
claude.sh 是针对claude配置切换的函数,一般来说,在使用多个公益站情况下,我们会创建多个配置文件,像这样:
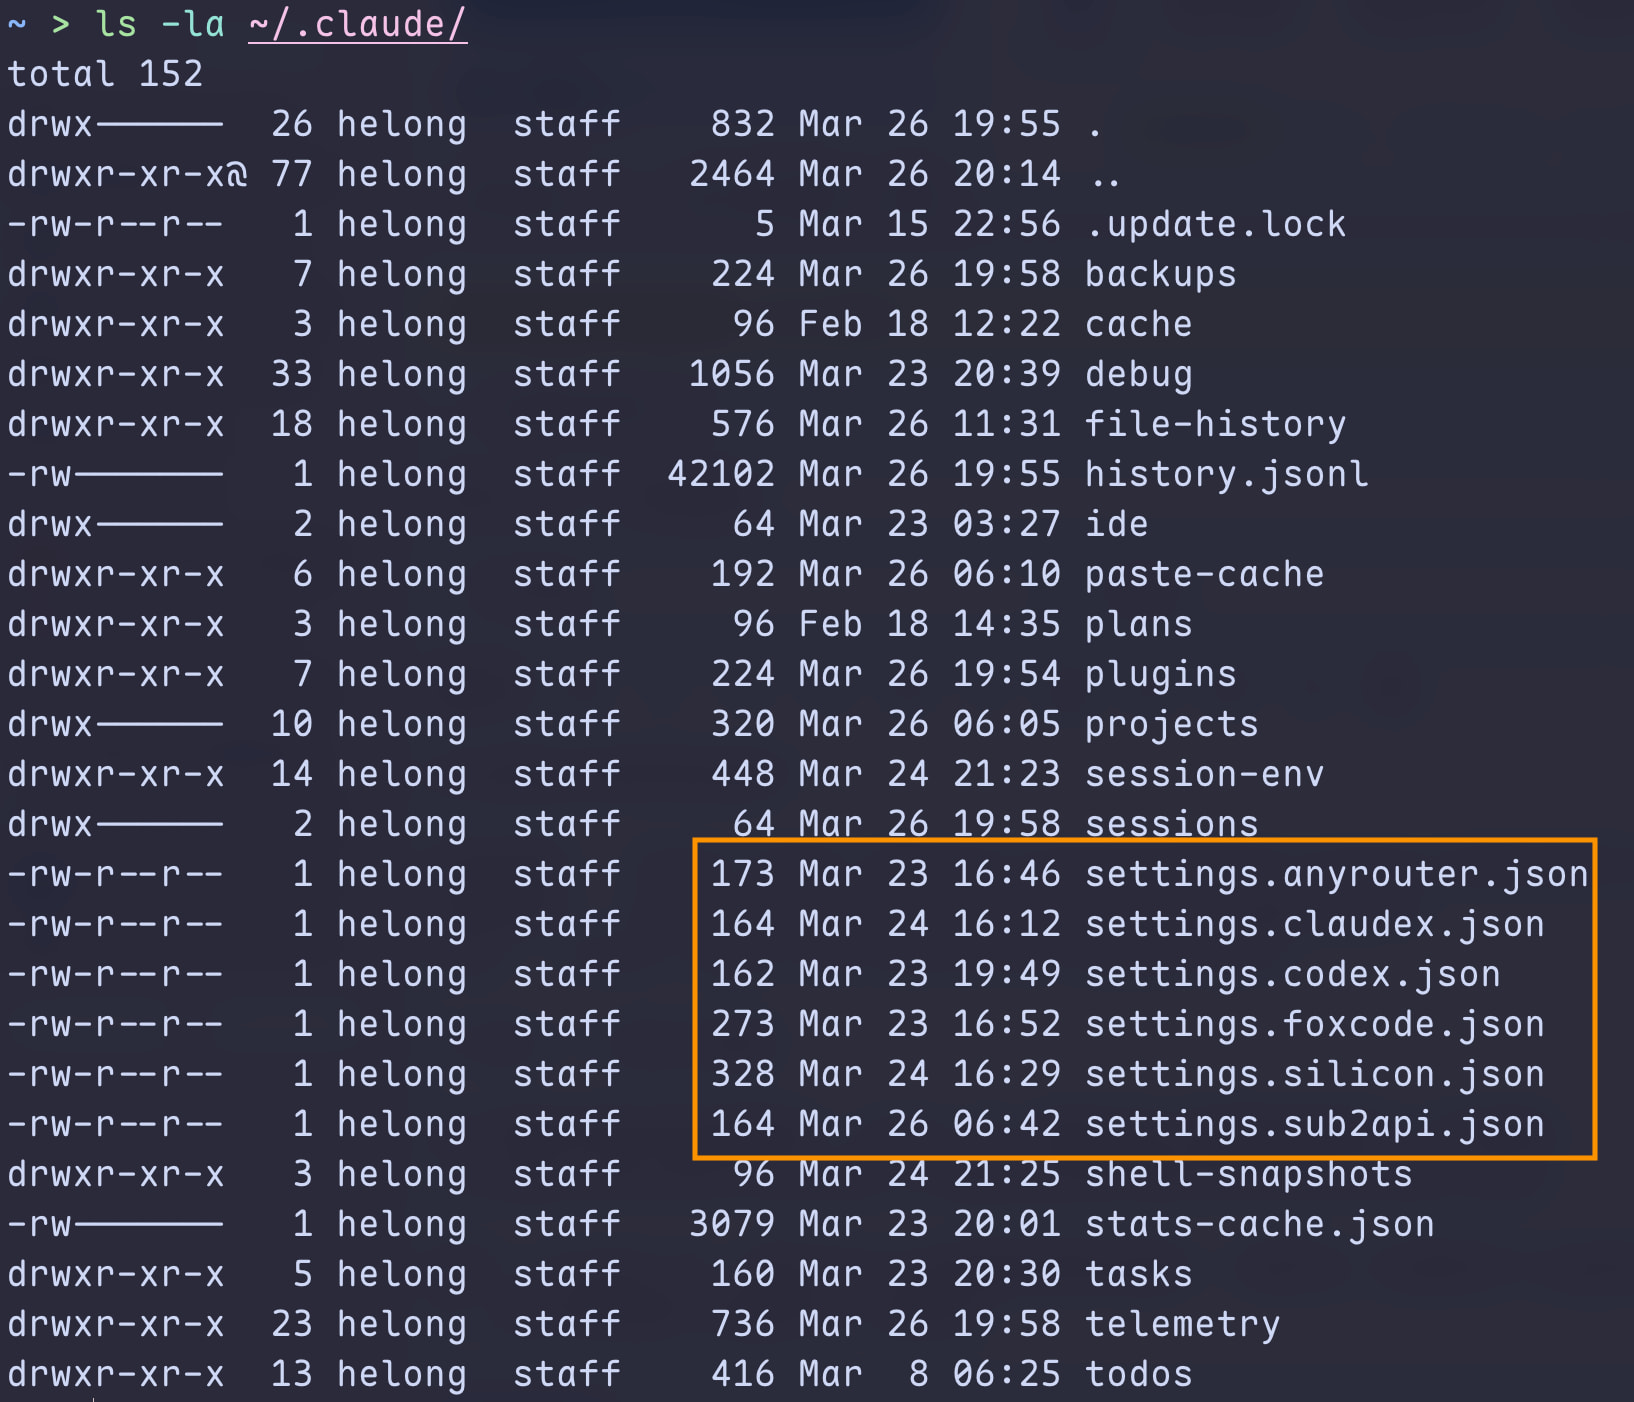
那我们切换的时候就可以:claude --settings ~/.claude/settings.codex.json
claude-cfg [name] -c :
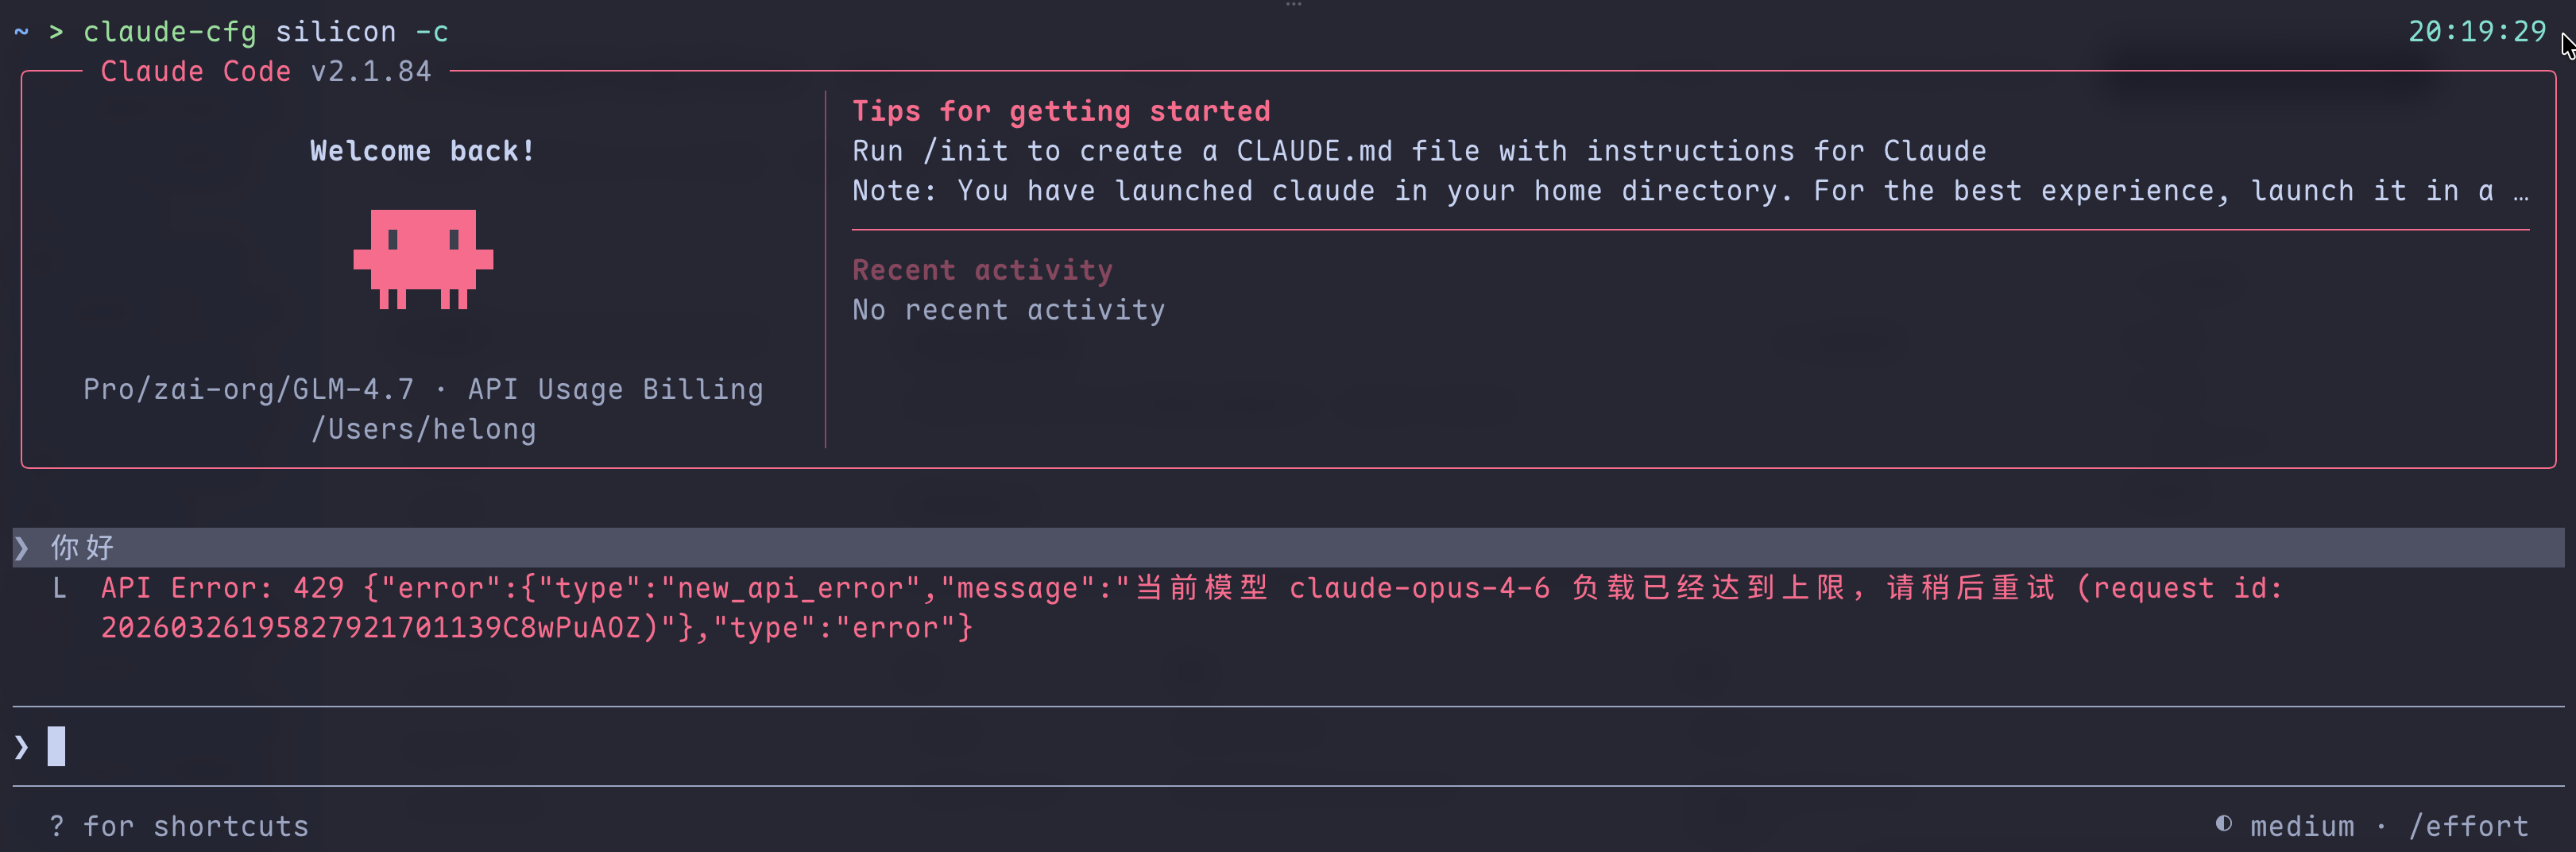
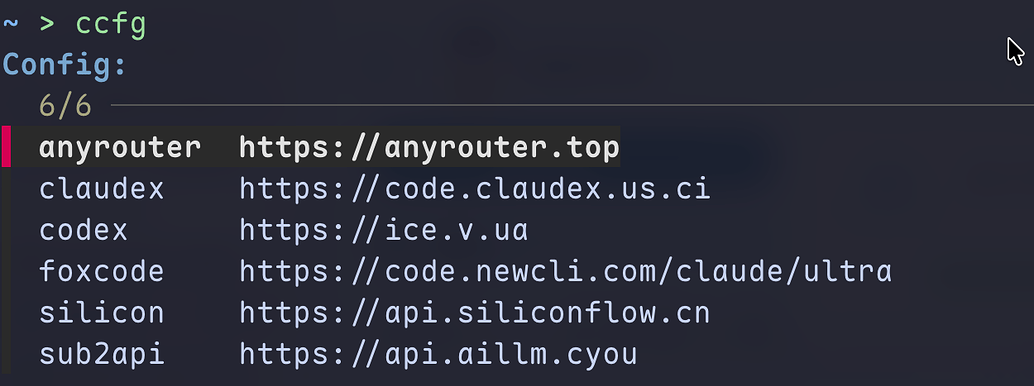
后面也可以加对应的参数等等,如果不需要加参数,仅简单的新对话启动也可以使用 ccfg列出所有的配置进行选择,这个功能依赖 fzf :
在此留下对应的文件 ~/.shell/claude.sh
1
2
3
4
5
6
7
8
9
10
11
12
13
14
15
16
17
18
19
20
21
22
23
24
25
26
27
28
29
30
31
32
33
34
# ============================================================
# Claude Code 配置
# ============================================================
claude-cfg() {
    claude --settings ~/.claude/settings."$1".json "${@:2}"
}

_claude-cfg() {
    _values 'configurations' $(ls ~/.claude/settings.*.json 2>/dev/null | sed 's/.*settings\.\(.*\)\.json/\1/')
}
compdef _claude-cfg claude-cfg

ccfg() {
    local selected cfg file name url

    selected=$(
        for file in ~/.claude/settings.*.json; do
            [[ -f "$file" ]] || continue

            name="${file##*/}"
            name="${name#settings.}"
            name="${name%.json}"
            url="$(jq -r '.env.ANTHROPIC_BASE_URL // ""' "$file" 2>/dev/null)"

            printf '%s\t%s\n' "$name" "$url"
        done | sort | while IFS=$'\t' read -r name url; do
            printf '%-20s\t%s\n' "$name" "$url"
        done | fzf --height=10 --reverse --prompt="Config: "
    )

    [[ -n "$selected" ]] || return
    cfg="${selected%%[[:space:]]*}"
    claude-cfg "$cfg"
}- 优化 —— 两个小功能
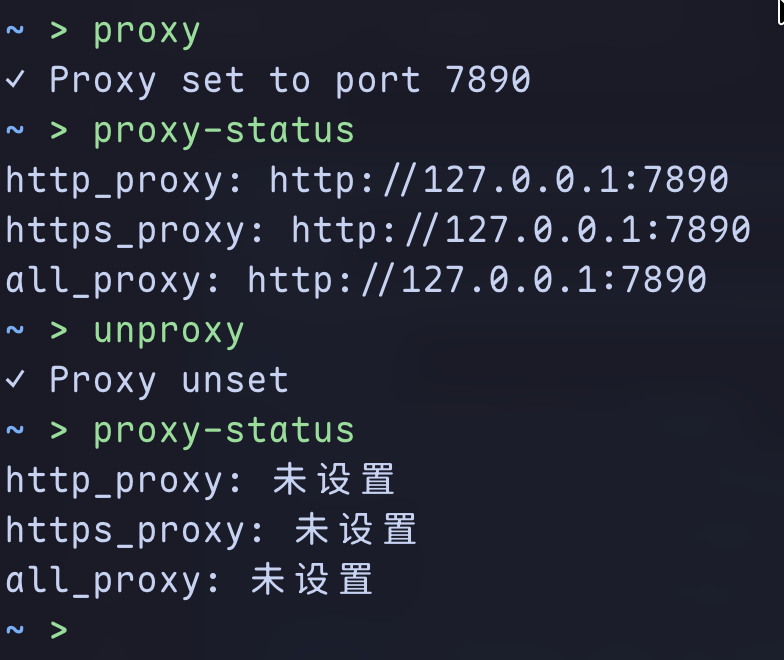
~/.shell/proxy.sh
1
2
3
4
5
6
7
8
9
10
11
12
13
14
15
16
17
18
19
proxy() {
    local port=${1:-7890}
    export https_proxy=http://127.0.0.1:$port \
           http_proxy=http://127.0.0.1:$port \
           all_proxy=http://127.0.0.1:$port
    echo "✓ Proxy set to port $port"
}

unproxy() {
    unset https_proxy http_proxy all_proxy
    echo "✓ Proxy unset"
}

proxy-status() {
    echo "http_proxy: ${http_proxy:-未设置}"
    echo "https_proxy: ${https_proxy:-未设置}"
    echo "all_proxy: ${all_proxy:-未设置}"
}
第二个,ssh选择器,在ssh配置文件中,设置了多个机器的情况下:
1
2
3
4
5
6
7
8
9
10
11
12
13
14
15
16
17
18
~ > cat .ssh/config                                                                                                                      20:33:36
# Added by OrbStack: 'orb' SSH host for Linux machines
# This only works if it's at the top of ssh_config (before any Host blocks).
# This won't be added again if you remove it.
Include ~/.orbstack/ssh/config

Host *
  SetEnv TERM=xterm-256color
  IdentityFile ~/.ssh/id_rsa_web
  ServerAliveInterval 60
Host gpu
  HostName ***
  Port 6666
  User cd
Host 2
  HostName ****
  Port 6666
  User ab
可以通过 cssh 列出所有的配置选择连接,这个功能依赖 fzf :
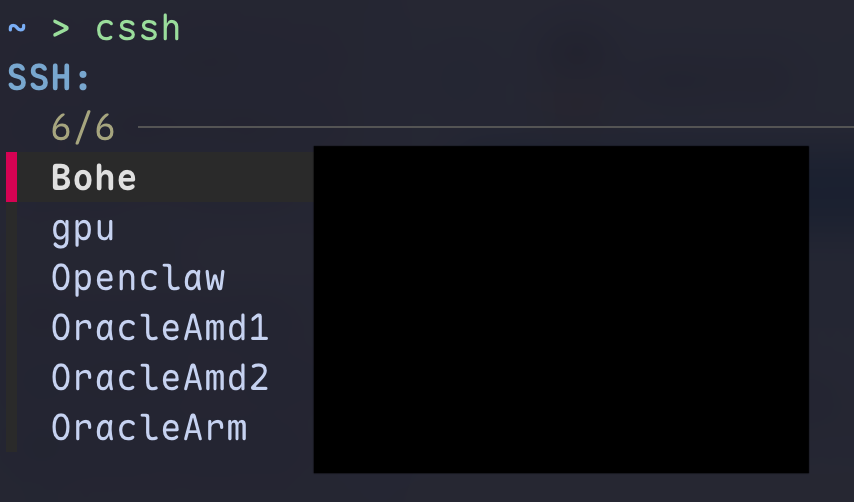
文件是 ~/.shell/cssh.sh
1
2
3
4
5
6
7
8
9
10
11
12
13
14
15
16
17
18
19
20
21
22
23
24
25
26
27
28
29
30
31
32
33
34
35
36
37
38
cssh() {
    local host
    host=$(
        awk '
            BEGIN {
                current_host = ""
                current_hostname = ""
            }

            /^[[:space:]]*Host[[:space:]]+/ {
                if (current_host != "" && current_host != "*") {
                    printf "%s\t%s\n", current_host, current_hostname
                }

                current_host = $2
                current_hostname = ""
                next
            }

            /^[[:space:]]*HostName[[:space:]]+/ {
                current_hostname = $2
                next
            }

            END {
                if (current_host != "" && current_host != "*") {
                    printf "%s\t%s\n", current_host, current_hostname
                }
            }
        ' ~/.ssh/config |
        sort |
        column -t -s $'\t' |
        fzf --height=10 --reverse --prompt="SSH: " |
        awk '{print $1}'
    )

    [[ -n "$host" ]] && ssh "$host"
}
最后在 ~/.zshrc 加载 ~/.shell/ 下定义的所有函数:
1
2
3
4
# 加载自定义函数
for file in ~/.shell/*.sh; do
    [ -f "$file" ] && source "$file"
done
Comments